

Blogging Tutorial - Part 4 - How to Start a Blog Website

Hello Friend! welcome to Blogging Tutorial - Part 4.
First of all, let me tell you that who already have Blogspot blog but do not have enough good idea on blog settings can also get help from this blog article. In Part 1, Part 2 and Part 3, we already learned how to create a blog, what is blog dashboard and its functions and how to write and post a blog article using blog post editor. Today we will be familiar with various functions and preferences of Blogger's 'Settings' in detail. Let's start...
In my Blogging Tutorial - Part 2 - How to Start a Blog Website, I already introduced you with the 'Settings Option'. There you can find a short description of every options inside 'Settings'. Now I will discuss details and basic settings on blogger that you need configure your blog.
Login to Blogger and click on Settings, you will see 9 tabs below. They are:
- Basic
- Post, comments and sharing
- Language and formatting
- Search preferences
- Other
- User settings
Let's get acquainted
with the default settings of each tab.

1. Basic

Blogger Blog Settings
1. Basic
You will find total 7 options here. We will discuss all of them gradually.
- Basic>Title: Title shows the name of your blog which you have been given during creating the blog. With this option you can change your blog name. Sometimes we need to change our blog name because we become more mature with time. May be you choose the wrong or appropriate blog name at the beginning and now you got better idea than before, you can change your blog title. But I strongly recommend you not to change your blog name frequently, not more than 2 times in a year. It will make confusion for your visitors also affect google search engine algorithms. Thus, your article ranking may be dropped.
To change your title, go for -
Basic>Title>Edit> Rename you blog with appropriate title >Save changes.
- Basic>Description: You can write down here what is your blog about. It is more like a sub-title of your blog name, usually appears just under the blog title. It helps your reader to have idea about what is the subject of your blog. Add a short and eye-catching description here for your reader.
To add description, go for -
Basic>Description>Edit> Write your description > Save changes
- Basic>Privacy: This is a very important option for SEO. This option allows your blog to be listed on blogger and make visible to search engines.
To make your blog listed on blogger and visible to search engines go for -
Basic>Privacy>Edit> For 'Add your blog to our listings?' choose Yes > For 'Let search engines find your blog?' choose Yes > Save changes.

Basic Blog Settings
- Publishing>Blog Address: This is URL of your blog which you chosen during creating your blog (See Part 1). This URL made your blog accessible in web browser. You can change this URL using this option. If you already have a domain name or buy one you can change this URL. Usually blogger blog domain name is included in blogspot.com. But you can add a custom domain name here using this option. I recommend you not to change the URL until it is mandatory. It can create confusion to your readers and any wrong entry may let your blog lost form search engines permanently. Better keep it as it is.
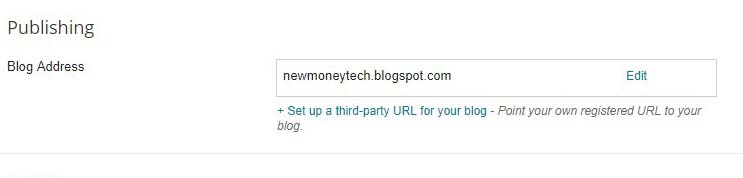
Blog Address URL
- HTTPS>HTTPS redirect: With this option you can turn on HTTPS and HTTPS redirect option for your blog. That means turning on HTTPS redirect will always redirect your visitors directly reach to the encrypted version of your blog.
To turn on HTTPS redirect, go for -
HTTPS>HTTPS redirect> Choose from drop down menu > Yes |
| Turn on HTTPS redirect |
- Permission>Blog Authors: With this option you can invite guest authors for your blog. You can also allow more administrator for your blog. If you use a personal blog, I recommend you to keep this option as it is by default.
- Permission>Blog Readers: With this option you can control who or which group of people can read your blog. Generally it is set at Public by default so that anyone can read your blog. Keep this option as it is.
 |
| Permission for Blog Authors & Readers |
2. Post, comments and sharing
- Posts>Show at most/Post template/Showcase images with Lightbox: The 'Show at most' option allow you to control how many post you like to show on first page. Generally it is 7 by default but you can change it as you like. We should keep the other two options as they are by default because it is the best settings for blogger blog. Set like below picture:
 |
| Blog Post Settings |
- Comments>Comment Location / Who can comment / Comment Moderation : Comments settings will help you to manage your comment location, who can comment and what types of comments visitors can post on your blog.
For comments setting, go for -
1. Comments>Comments Location?> Select Embedded >Selecting 'Embedded' will allow your visitors to respond on other comments on the blog.
2. Comments>Who can comment?> Select User with Google Accounts >
This will protect your blog from anonymous and spam comments.
3. Comments>Comment Moderation?> Select Always > Save settings
Keep the other settings as default by blogger.
 |
| Comments Settings |
- Google+ comments>Use Google+ comments on this blog? / Share to Google+ : Comments Don't make this option Yes and don't share to Google+. If you do so, 'Post, comments and sharing' tab will disappear from your blog. Leave these settings intact as it is. There are other options from where we can share our blog to social media. I will discuss about that at the time of theme settings for blog.
3. Email
- Email>Posting using email: Using this option you can post your blog directly from your email account. To do so, first you need to add a secret word with your email address e.g. technomoney2018.secretword.blogger.com. After that you will have three options for publishing your blog post from your email account directly; 'Publish email immediately', 'Save emails as draft post' and 'Disabled'. Generally 'Disabled' selected by default. But I recommend you to select the 'Save emails as draft post' option.
For Email setting, go for -
Email>Posting using email> Select 'Save emails as draft post'> Save settings- Email>Comment Notification Email/Email posts to: Using this option you can add maximum 10 email addresses to which you get notification automatically when any post published in the blog. If you want to use more than 01 email address, use comma (,) for separating them.
- With email post to option you can publish your blog post just sending an email. You can use maximum 10 email addresses here also.
For Email setting, go for -
Email>Posting using email> Select 'Save emails as draft post'> Save settings |
| Email settings for blog |
4. Language and Formatting
This option will help you to change your blog language, time zone and time format.
This option will help you to change your blog language, time zone and time format.
 |
| Blog language and formatting settings |
- Language>Language: Language describes what is your blog language i.e. in which language your blog is written. It is set while you create the blog. But you can change the language if necessary. To do so, select the correct language from the drop down menu.
- Language>Enable Transliteration: This option will allow you to convert words of your blog language to selected language. Suppose you want to convert your blog language into Russian language, to do so just enable the option and select the language to convert with. As soon as you enable that option a language converting tool will be added in your post editor. Using that tool you can convert your words.
 |
| Enabling Transliteration |
- Formatting>Time Zone: Select the time zone for your region.
- Formatting>Date Header Format: This option enables displaying date on the top your blog post.
- Formatting>Timestamp Format: Set the time format for your blog posts using this option.
- Format>Comment Timestamp Format: This option will help you to set time format for your blog comments.
5. Search Preferences
Search preferences is the most important setting option for blogger blog. There are certain settings inside this which is the base of your blog SEO. These settings include both basic and advanced. So, let's have a look on each setting options and just do as I say, your blog will be optimized as well as listed on search engines.
- Meta tags>Description: Describe here what your blog is about. No one will see this description but it will help the search engine to optimize your blog on top. You can add maximum 150 characters here to describe your blog. I recommend you to add your prime keywords here separating by comma (,).
For Meta tags description setting, go for -
Meta tags>Description>Edit> Select Input your keywords here separating by comma (,)> Save changes |
| Meta Tags Description |
When you enable this description, another option 'Search Description' will be open for you in the blog post editor. 'Search Description' allows you to add description for your single blog post. The description you write will be shown just under the name of your blog in the search engines. That means when anyone search and find your blog address, this description will be just under the name of your blog post for the reader. It will help your reader to understand the subject of your blog and thus will increase your CTR.
 |
| Search Description in search engines |
I already discussed the process of adding 'Search Description' for blog posts in the part 3 of this Tutorial in details. Please check that article and add search description for your every blog post.
- Errors and redirection>Custom Page Not Found: If your reader try to access to such a page which actually not exits or which page is not showing for any problems being occurred for that specific page, a 404 page will appear to them. This option allow you to create and add customized 404 page for your reader. I will discuss about how to create 404 and other customized pages like 'About Me', 'Contact" later in a separate episode.
- Errors and redirection>Custom Redirects: Sometimes our blog posts may show error report during opening. In such situation, our reader will get a 404 error message during searching or opening that specific page and thus can affect to our blog for getting traffic. This can be happened for many reasons. If such problem happens, one of the effective solution is to redirect the old URL to a new one. As a result when readers click for the post, they will redirected to the corrected URL from the error URL and the page will be appeared to them. 'Custom Redirect' allow us to do that.
For Custom Redirects setting, go for -
Errors and redirection>Custom Redirects>Edit>From> Put Old URL>To>Put Corrected URL>Save>Save changes
 |
| Add URL for Custom Redirects |
- Crawlers and Indexing>Google Search Console: This option allow you to add your blog to the Google Search Console so that people can find your blog while searching in the Google. This is very very important for SEO of your blog. Let's see how to add your blog to google search console
For add your blog to google search console, go for -
Crawlers and Indexing>Google Search Console>Edit
You will redirected to Google Search Console Page. Go for -
Google Search Console>Home>ADD A PROPERTY
 |
| Add blog to Google Search Console |
You will redirected to Google Search Console Page. Go for -
Google Search Console>Home>ADD A PROPERTY
 |
| Add your blog site in google search console |
A new dialogue box will appear. Paste your blog address in the blank and click on Add.
 |
| Add blog URL to google search console |
That's it. Your blog is added to the search console.
https://ctrlq.org/blogger/>Paste your blog URL>Generate Sitemap>Copy the generated sitemap>Search preferences>Customs robots txt>Edit>Paste the copied sitemap>Save changes.
Crawlers and Indexing>Custom robots header tags>Edit>Enable custom robots header tags>Yes>Homepage:>all>noodp>Archive and Search pages>noindex>noodp>Default for Posts and Pages>all>noodp>Save changes.
Please see the below picture very carefully, that will help you to understand the above setting.
5. Other/User settings
I already discussed details about these two options in my previous article 'Blogging Tutorial - Part 2 - How to Start a Blog Website'. Please read that article to understand the functions of these two options.
Last Words
This is all for today. With this tutorial I tried to show you all the important settings for a blog. Using and enabling this settings you will be able to make your blog visible to search engines and can submit to google search console which will bring you more traffic. In my next episode I will discuss on how to design your blog as like as professional blog. Up to then, please stay tune.
- Crawlers and Indexing>Custom robots txt: Setting up Customs robots txt a very important settings option for blog. This option allow you to instruct the search engine that you don't want it to crawl certain pages of your blog. Before adding customs robot txt you have to create the robots txt form another website. It is easy and simple.
To add customs robots txt, go for -
 |
| Create customs robots txt |
 |
| Customs robots txt created |
 |
| Add customs robots txt to blogger |
- Crawlers and Indexing>Custom robots header tags: Settings of Custom robots header tags are very important. Custom robots header tags are responsible for identifying your blog updates and notifying search engines about those updates. These tags connects with crawlers for search visibility. They must be perfectly set.
To set Ccustoms robots header tags, go for -
Please see the below picture very carefully, that will help you to understand the above setting.
 |
| Custom robots header tags setting |
- Monetisation>Custom ads.txt: You can enable this option when you get Google AdSense approval. Enabling this option will help you to identify and restrict the fraud ad sites.
5. Other/User settings
I already discussed details about these two options in my previous article 'Blogging Tutorial - Part 2 - How to Start a Blog Website'. Please read that article to understand the functions of these two options.
Last Words
This is all for today. With this tutorial I tried to show you all the important settings for a blog. Using and enabling this settings you will be able to make your blog visible to search engines and can submit to google search console which will bring you more traffic. In my next episode I will discuss on how to design your blog as like as professional blog. Up to then, please stay tune.
Thank You


No comments